Developer Resources
Building a Front-End dApp
This example walks you through the process of creating a front-end dApp on the Internet Computer

Demo Front-End dApp Development
Walkthrough for blockchain developers
With this sample walkthrough, blockchain developers used to hosting their static assets via AWS S3 buckets, Fastly, or Netlify get an overview how a front-end dApp is built on the Internet Computer.
In the following demo, we are going to be using Gatsby.js.
Preparations
To get started, simply run the command npm init gatsby. The system will in turn ask you, “What would you like to call your site?” You can choose any name you like, in the context of our demo, we are going to name the site and the corresponding folder “contact_book.”
We are not going to use a CMS, so when the CLI asks us if we do so, we answer, “No.” As a preference, you can choose “styled-components” and depending on your preferences, you can skip the optional features. Confirm the last step with “Yes” and a new project will be created for you.
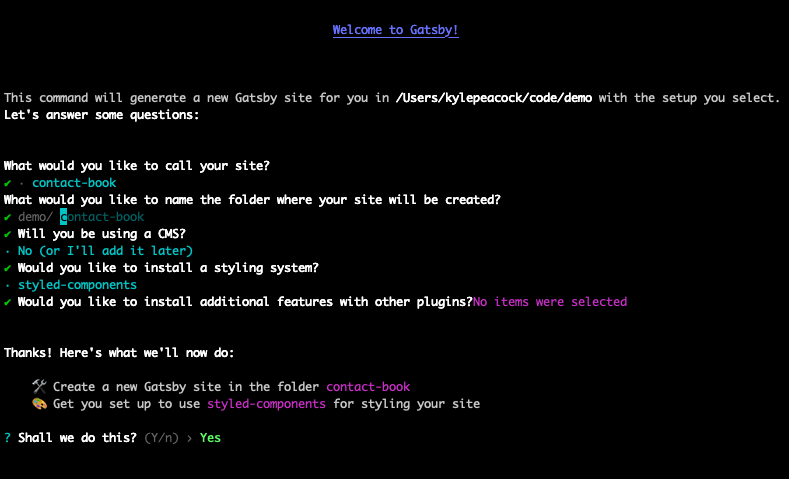
The created file structure will look as follows:
Deploying a static website
In the next step, you can start webpack-dev-server via the npm run develop command. To compile your project into static HTML, CSS, and JS assets, run npm run build.
Once this is done, you can host the project on the Internet Computer blockchain. Here are the required steps to do so:
- Create a
dfx.jsonfile at the root of your project and configure it - Install the dfx SDK
- Deploy the project to the IC by running the command
dfx deploy
Let’s have a closer look at each of the three steps in the following.
Creating the dfx.json file
In the first step, create and configure your dfx.json file and make sure it is located at the root of the project. The build output is compiled by Gatsby into the public directory. For this reason, your dfx.json file will look as follows:
Installing the dfx SDK
For instructions on installing the dfx SDK, simply navigate to dfinity.org/developers/. Mac and Linux are natively supported. Windows users can use WSL or VirtualBox.
Deploying the site to the Internet Computer
Compile your website by running npm run build. In the next step, you can deploy your site to the IC by running dfx deploy --network ic --no-wallet.
Finding your canister ID
Wait until your site deploy is completed. In the next step, run the command dfx canister id www to find the ID of your canister. Navigate to https://{canisterId}.ic0.app to access the demo from within your web browser. Be sure to replace {canisterId} with the ID of your canister.
Funding your canister
To deploy and fund your first canister, have a look at this guide: Deploying a Canister via the NNS dApp. The guide walks you through the following process:
- Sending
ICP tokensto your NNS dApp wallet - Creating a canister via the NNS front-end dApp
- Linking the canister with your dfx principal
- Deploying your canister to the Internet Computer
- Funding your canister with cycles
Customizing the demo dApp
In the next stage, we would like to customize the code of the demo dApp so that we can build a contact book. To do so, the existing src/pages/index.js logic needs to be replaced with the new one. The basic outline of the demo contact book dApp looks like this:
- Form for creating a contact
- Input field to search existing contacts by their email address
- Component that renders the saved contact when searched
There are different options you can choose from to persist that data. These options include writing the data as simple text to localStorage, Firebase, or MongoDB Atlas and to encode it via JSON.stringify(). Another option is to persist the data via a canister on the Internet Computer.
Adding a back end for the dApp
To add a back-end canister to our project, a few changes need to be made:
- Adding the contract’s source code
- Configuring the
dfx.jsonfile for the canister’s backend - Configuring Gatsby so that the code generated by dfx can be aliased
- Making actor calls to the back end via the
@dfinity/agent npmpackage - Connecting the dApp logic to the actor
Adding back-end logic
The following is a Motoko canister is stored in a HashMap and is used for implementing the logic of getting and setting information.
A stable var is used to persist the data across upgrades. The code above initializes a HashMap interface that can be used for storing data via Text type key and Text type value. Set and get interfaces are implemented as well. Preupgrade and postupgrade hooks are added to persist data across upgrades as well.
You can save the Motoko canister to a new folder within your src directory, located at src/backend/contact_book/Main.mo.
Configuring the dfx.json file
In the next step, we are going to configure dfx so that it is aware of the new Motoko canister. You can start configuring dfx by adding a new canister object and linking it a dependency for the front-end canister. Here is a sample how the configuration looks like:
Configuring Gatsby
After configuring dfx.json, we can update Gatsby. To do so, we are going to use an alias pointing to the dynamic code dfx generates. This code is hidden in a .dfx folder loacted in your project. To import custom interfaces for the new back end, a gatsby-node.js file with the following code is crated in the root of your project:
A proxy is added to the gatsby-config.js file that proxies the default address of the dfx replica (localhost:8000).
Using @dfinity/agent
The above steps have aliased the dfx generated resources. Once this is completed, you can import these into your codebase. To do so, create src/actor.js and then import @dfinity/agent from dfx-generated/contact_book.
This creates an agent which is then passed to an Actor constructor. Included are the idlFactory and canisterId which are also passed along. The actor is then exported. It has the set and get methods preconfigured with an ability for making type-safe calls to the canister’s back end via its promise-based API.
Wiring the dApp up
Finally, it all can be wired up by modifying the index.js page with logic so that submissions from the email field are stored. To do so, the actor is imported as a dynamic import so that we can avoid the initialization of the HttpAgent during the actor’s server-side rendering for Gatsby.
The data is stored and subsequently cleaned up from the contact form by using the set method during handleSubmit.
After cleaning the contact form, the get method is used to fetch existing contacts via the email search.
Once you’ve done all this, your very first and fully functioning dApp for the Internet Computer is finished.
Wrapping up and summary
The project structure of the demo project looks as follows after having accepted the changes to the code base:
If you would like to test your changes in a local environment, simply run the dfx deploy command. Doing so will start the process of building and uploading your back end to the local replica. Once this is completed, you can run the front end via npm run develop — –port 3000 again. This allows you to use different development features, for example hot module reloading. A port is specified because Gatsby defaults to port 8000. You can now test your dApp locally. Feel free to play around with it and submit a contact via the UI and then retrieve it by searching for it.
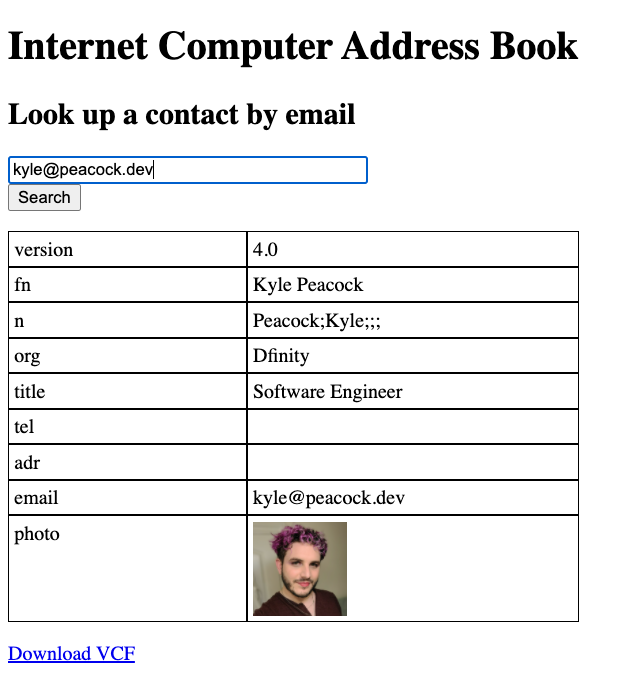
You can download the demo project via https://github.com/krpeacock/ic-vcf-gatsby

